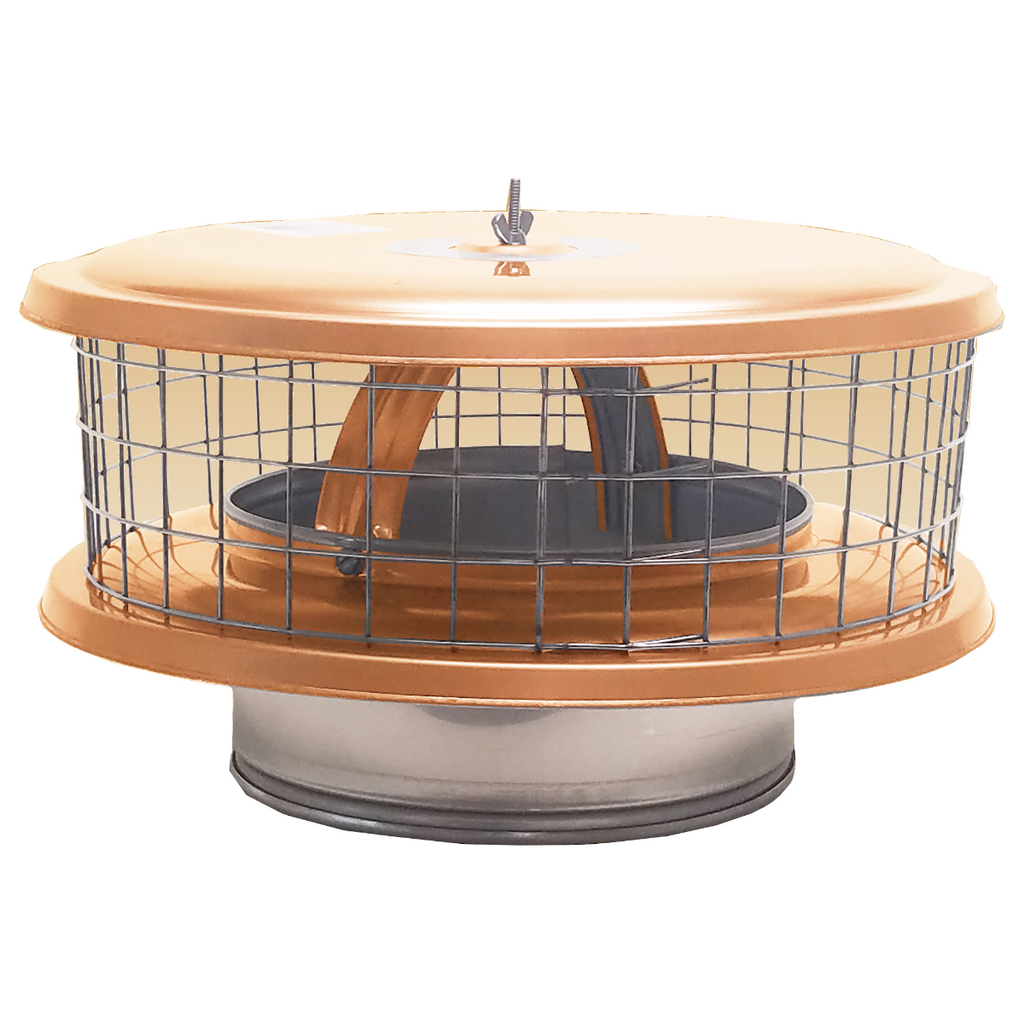
Copper WeatherShield Chimney Cap - Non Air Cooled
Product Images
Product Details
Specifications
A unique and universal alternative to the traditional solid-pack pipe chimney cap. Its copper construction assures superior corrosion resistance to weather and the hostile flue gas environment. For use with solid pack Class A, masonry and single wall chimneys to keep the rain, snow, leaves and animals out, but keeps sparks in. Features 1" mesh screen in stainless steel. Note: These are made custom per order and will add to processing time.
An added feature is the removable mesh screen that provides a measure of safety by helping to contain sparks.100% stainless steel construction assures long life and rust-free performance. WeatherShield features a spring fit for easy installation and fast removal for chimney cleaning.
Sizing:
| Inside Flue Diameter | Lid Size Diameter |
|---|---|
| 3" | 8" |
| 4" | 8" |
| 5" | 13" |
| 6" | 13" |
| 7" | 13" |
| 8" | 13" |
| 9" | 16" |
| 10" | 16" |
| 11" | 19" |
| 12" | 19" |
SIZES: Custom sizes available up to 48". Please contact us for price, shipping time, and specifications.
CHIMNEY TYPES: Single wall, solid pack, insulated, Class A, B vent, and square or rectangular masonry chimneys using Masonry Adapter.
Installation Instructions:

Step 1: Assembling the Copper WeatherShield. Move hoop upwards to vertical position and remove wing nut. Center the screen on the bottom plate. Position the top plate so screw at top of hoop passes through center hole of top plate. Secure with the wing nut as shown.

Step 2: Fitting the Copper WeatherShield inside the flue. WeatherShield chimney caps spring fit inside the round metal or masonry flue. Squeeze the bottom of the WeatherShield and push down into the flue to assure snug fit.

Step 3: Applying a Watertight Seal. Apply a thin layer of chimney silicone caulking to seal joint between WeatherShield and top of chimney. The chimney silicone is an optional add-on for this product.

Step 4: Final Positioning of the Copper WeatherShield. Push the WeatherShield copper chimney cap down firmly into the chimney section to make sure final connection is tight and secure. If you are installing on rectangle or square flues, please visit the masonry adapter page.
Product Details:
A unique and universal alternative to the traditional solid-pack pipe chimney cap. Its copper construction assures superior corrosion resistance to weather and the hostile flue gas environment. For use with solid pack Class A, masonry and single wall chimneys to keep the rain, snow, leaves and animals out, but keeps sparks in. Features 1" mesh screen in stainless steel. Note: These are made custom per order and will add to processing time.
An added feature is the removable mesh screen that provides a measure of safety by helping to contain sparks.100% stainless steel construction assures long life and rust-free performance. WeatherShield features a spring fit for easy installation and fast removal for chimney cleaning.
Sizing:
| Inside Flue Diameter | Lid Size Diameter |
|---|---|
| 3" | 8" |
| 4" | 8" |
| 5" | 13" |
| 6" | 13" |
| 7" | 13" |
| 8" | 13" |
| 9" | 16" |
| 10" | 16" |
| 11" | 19" |
| 12" | 19" |
SIZES: Custom sizes available up to 48". Please contact us for price, shipping time, and specifications.
CHIMNEY TYPES: Single wall, solid pack, insulated, Class A, B vent, and square or rectangular masonry chimneys using Masonry Adapter.
Installation Instructions:

Step 1: Assembling the Copper WeatherShield. Move hoop upwards to vertical position and remove wing nut. Center the screen on the bottom plate. Position the top plate so screw at top of hoop passes through center hole of top plate. Secure with the wing nut as shown.

Step 2: Fitting the Copper WeatherShield inside the flue. WeatherShield chimney caps spring fit inside the round metal or masonry flue. Squeeze the bottom of the WeatherShield and push down into the flue to assure snug fit.

Step 3: Applying a Watertight Seal. Apply a thin layer of chimney silicone caulking to seal joint between WeatherShield and top of chimney. The chimney silicone is an optional add-on for this product.

Step 4: Final Positioning of the Copper WeatherShield. Push the WeatherShield copper chimney cap down firmly into the chimney section to make sure final connection is tight and secure. If you are installing on rectangle or square flues, please visit the masonry adapter page.
Specifications:
DIY Center
(AKA ‘The Rockford Files’)
From video tutorials to product walkthroughs, we have a variety of DIY resources just for you! Click the button below to view our entire library.


