How to Install a Sealtight Chimney Damper
July 19, 2023

Installing a Sealtight Chimney Damper
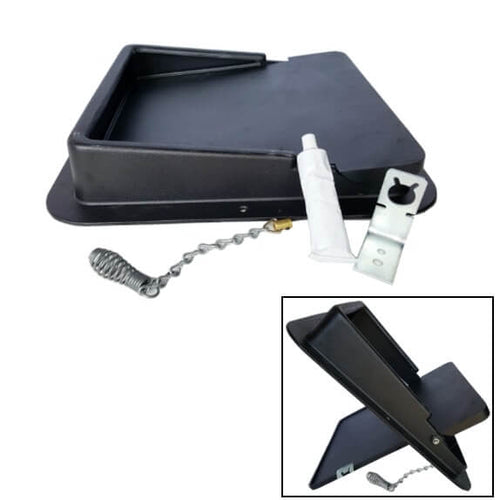
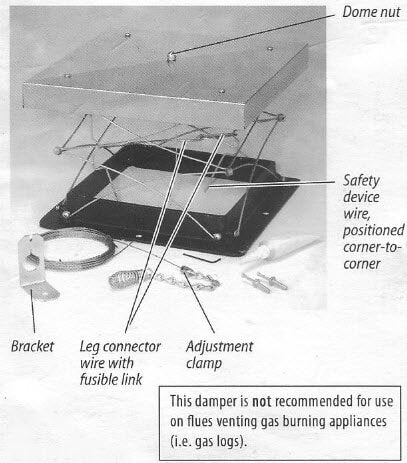
Step 1: Prepare the clay flue and damper by making certain the top of the flue liner is dry and clean. Install the Sealtight Damper on the flue so the high side of the damper is against prevailing (most frequent) wind. Be certain 4 inch spring will hang freely from lid when damper is closed. Lower unattached end of cable to fireplace opening below.
Step 2: Using the adhesive cap to open the tube, apply adhesive to the top of the flue liner all the way around the opening. Press the damper onto the flue liner. Allow 24 hours to set before using fireplace.
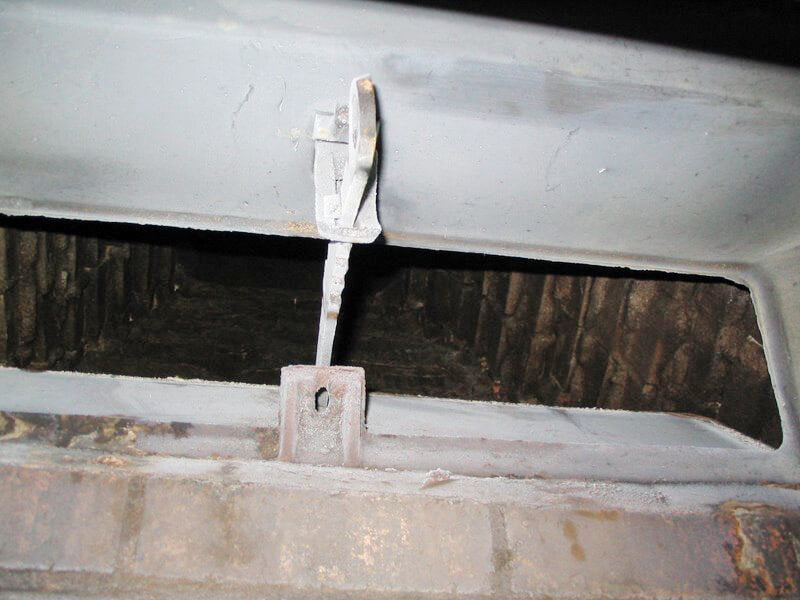
Step 3: Let's head off the roof and down into the house to the fireplace. The first step while we are inside is going to be to mount the bracket in the fireplace. Using a 1/4" masonry drill bit, drill one hole about 1" deep into the firebrick towards the front of the fireplace and about 20" off the firebox floor. Note: If brick is loose, first repair it with refractory mortar.
Insert nail anchor in top hole of bracket and secure to firebox wall with hammer. Drill second hole after bracket is attached to firebox wall. Add second nail anchor and secure.
Step 4: Pull the cable through the bracket until a slight tension can be felt. Damper should be closed. Slide brass lug into cable 1/2" above bracket. Close damper by pulling cable down and placing lug under bracket. Return to the roof and check that the damper is tightly sealed. If it is not, adjust lug upward for better seal. Do not overdo it - if lug is raised too far, this may activate the cable leg and actually open the damper. Cut off excess cable.
Opening and Closing the Sealtight Chimney Damper
Opening the Damper: Always open the damper before starting a fire. Pull handle down slightly and release, allowing lug to pull up and hang freely about 4" above the bracket. If lug only hangs 1" to 2" above bracket, damper may not be open. Note: Do not start a fire if damper is not clearly open. Failure to follow this rule may cause smoke damage.
Closing the Damper: Close the damper after the fire is completely out. Pull handle down until lug is below bracket. Move cable into any notch in bracket and release handle. Note: Closing the damper when fireplace is not in use will prevent heated or air-conditioned air from escaping out the chimney.
If damper doesn't open: This may occur due to heavy snow, ice, or improper installation. Pull the handle down sharply 3" to 4" below the bracket. This pulls down the extra cable leg to pull the lid open. Release the lug up past the bracket. If necessary, inspect the damper on your roof to determine how to get it open.
DIY Center
(AKA ‘The Rockford Files’)
From video tutorials to product walkthroughs, we have a variety of DIY resources just for you! Click the button below to view our entire library.


