How to Install a Lock-Top Chimney Damper
July 19, 2023

Installing a Lock-Top Chimney Damper
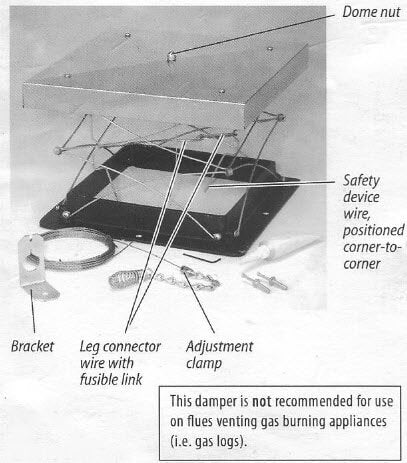
Step 1: Find the safety device wire located under the damper lid. Find the spring-loaded connecting tube with jam nut, cable, and handle in the hardware bag. Find the leg connector wire with fusible link in the bag, also. Remove dome nut from the end of connecting tube, and assemble chimney fire safety device as shown at right. The chimney fire safety device must be installed for the warranty to be in effect.
Step 2: Insert threaded end of conduit tube into underside of damper lid. Position safety device wire corner-to-corner and re-tighten dome nut onto end of bolt. Turn jam nut an additional ¼ turn with wrench to secure.
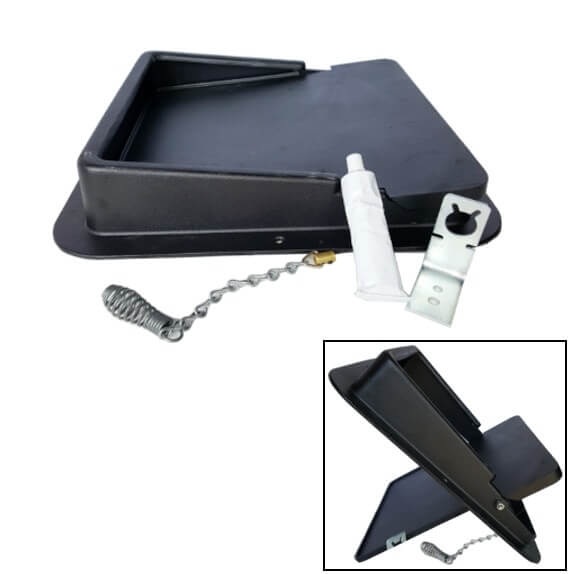
Step 3: Spread 1/4” bead of furnished adhesive around top of chimney opening. Insert cable and handle down chimney making sure they extend into fireplace. Center damper on top of chimney and press down firmly on frame. Fill any gaps with adhesive to ensure a proper seal. Allow adhesive to set 24 hours before using damper.
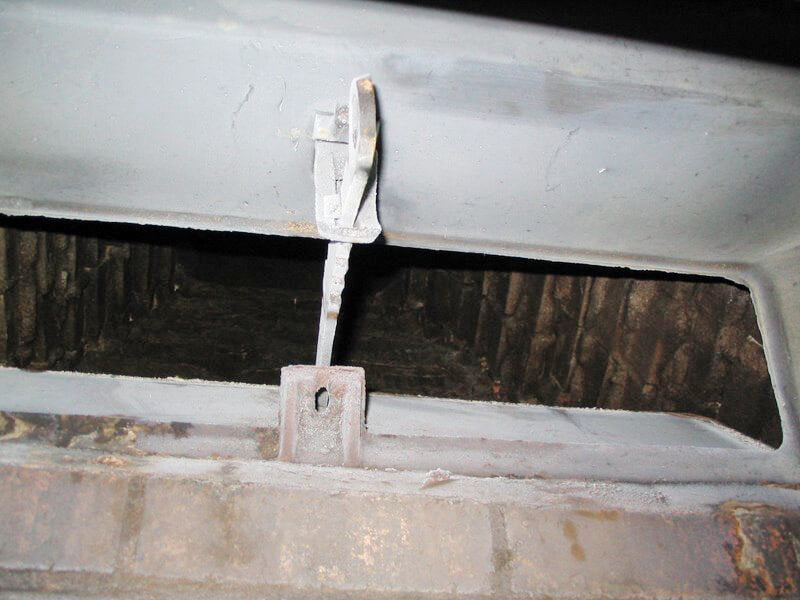
Step 4: Bracket Installation – Drill 1/4” hole in firebrick toward front of fireplace, approximately 20” off firebox floor. Insert nail anchor through top hole of bracket and into hole in brick. Fasten. Be sure bracket is straight and then use second hole in bracket as guide to drill a second hole in brick. Fasten with second anchor nail.
Step 5: Thread handle, chain, and cable through bracket hole until all slack is out of cable. Loosen brass adjustment clamp with Allen wrench and slide it up cable to bracket. Pull the cable to close damper, and adjust clamp position for the tightest seal. Tighten screw in clamp with Allen wrench. Cut and discard excess cable.
Lock Top Chimney Damper Product Info
Operational Instructions for Lock Top Chimney Damper
DIY Center
(AKA ‘The Rockford Files’)
From video tutorials to product walkthroughs, we have a variety of DIY resources just for you! Click the button below to view our entire library.


